

Demo
Quick function test
Transmits internal programme material or a 1 kHz test tone without an external audio source.
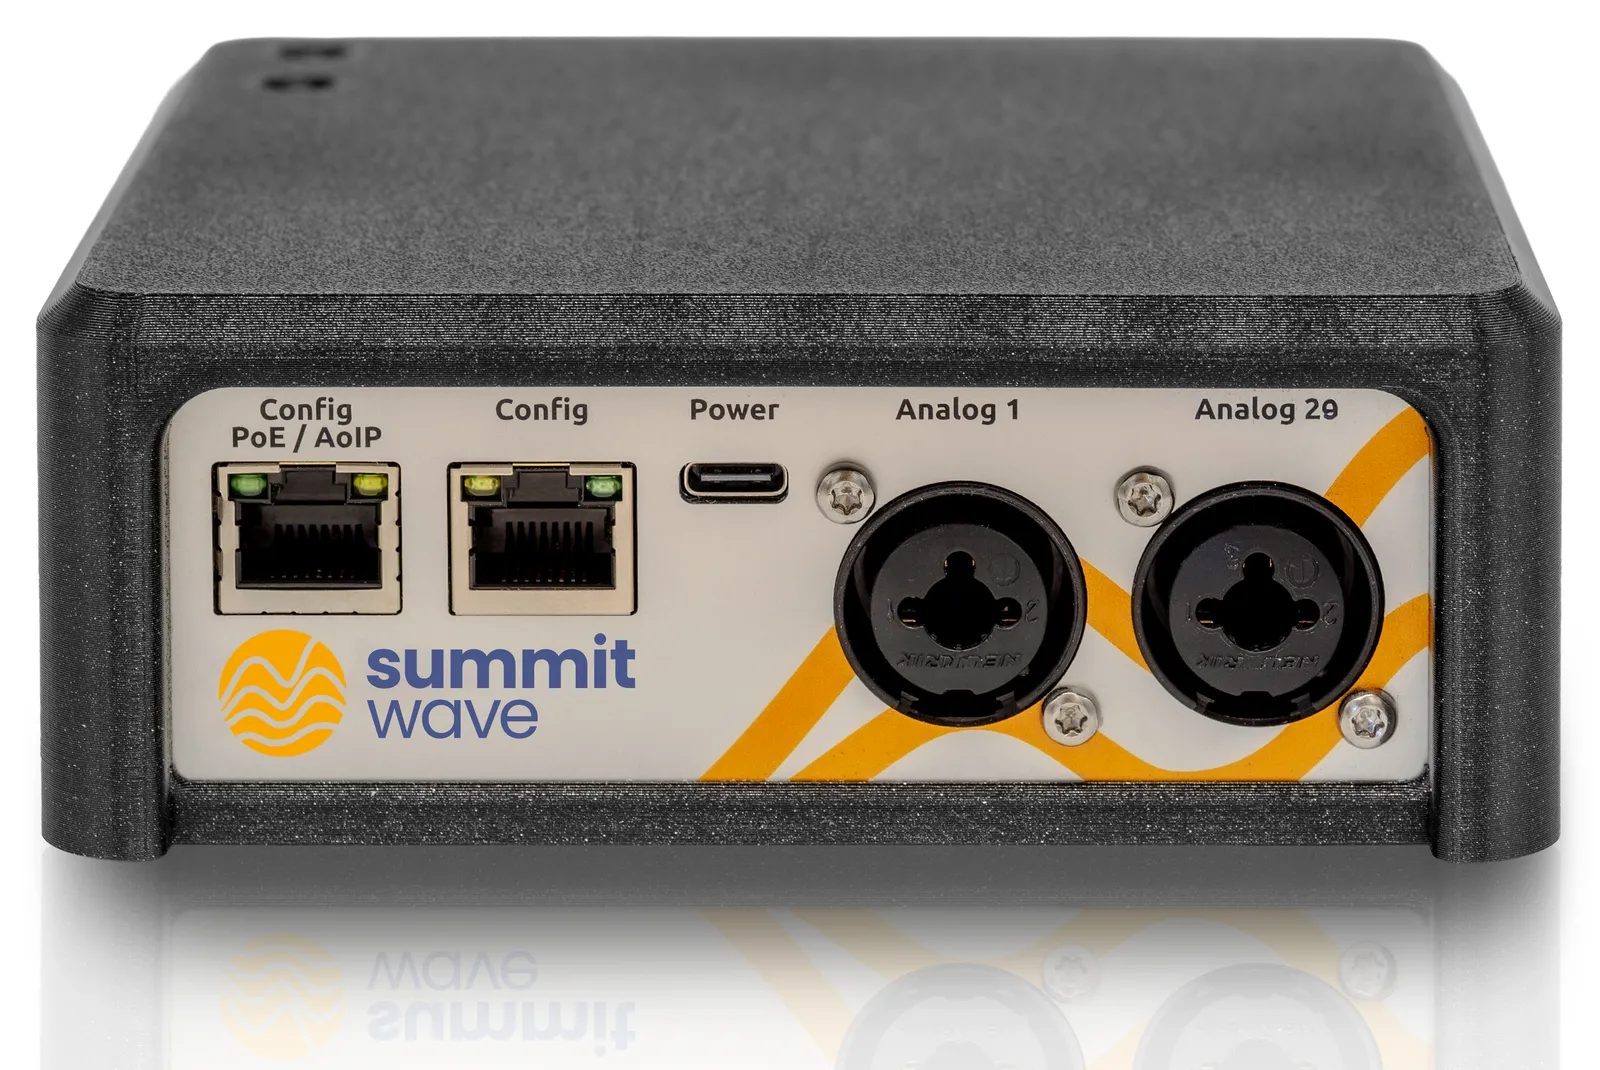
Connect the TX, open the web interface and start your first Auracast stream in a few steps.
Connect the network, required audio source and power supply before beginning configuration.
Connect the network port
For configuration you can connect the network cable to either port. The Config port (port 1) is for configuration only and does not support PoE — a TX connected only there therefore needs a USB-C power supply of at least 15 W (5 V / 3 A). Use the PoE + AoIP + Config port (port 2) when you want to use Dante or power the TX over PoE.
Connect the audio source
For Analog mode, connect a mic/line source to one of the two balanced XLR/TRS inputs: Analog 1 carries channel 1 and Analog 2 carries channel 2, or the left and right channel in stereo operation. For Network Dante, connect the PoE + AoIP + Config port to the Dante network. Demo mode does not require an external audio source.
Power on the TX
Power the TX through PoE on the PoE + AoIP + Config port (IEEE 802.3af) or over USB-C with a power supply of at least 15 W (5 V / 3 A). Both supplies may be connected at the same time: the TX then keeps running if one of them fails.
Wait for start-up
Wait approximately one minute for the device to complete its start-up process.
The computer and TX must be connected to the same network.
Find the device address
Read the device-specific address from the label on the rear, for example swtx1xxx.local.
Open the address
Open Chrome, Firefox or Edge and enter the .local address in the address bar.
Confirm the certificate message
Open the advanced section in the local browser warning and continue to the device. To remove the warning permanently, install the CA certificate as described below.
Sign in
Sign in to the device. For a device in factory condition, the currently documented default password is beacon.
NET::ERR_CERT_AUTHORITY_INVALIDChrome and Edge report “Your connection is not private” and give NET::ERR_CERT_AUTHORITY_INVALID as the cause; Firefox reports the same condition as SEC_ERROR_UNKNOWN_ISSUER. Both codes mean the TX certificate was issued by the Summitwave CA and that CA is not present in the certificate store.
The error concerns the verification of the issuer only, not the encryption. The connection is encrypted; the only thing left unverified is whether the other end really is your device.
For one-off access it is enough to confirm the message via the advanced section. If you configure the TX regularly, install the CA certificate once in the certificate store — the web interface then opens without a warning.
First download the certificate: summitwave-ca.crt. The same CA issues the certificates of all Summitwave devices, so installing it once covers your entire fleet.
| Property | Value |
|---|---|
| Issuer | CN = SummitWaveCA |
| Valid until | 24 June 2045 |
Both browsers use the same Windows certificate store, so a single import applies to Chrome and Edge alike.
Start the import wizard
Double-click the downloaded summitwave-ca.crt file and select “Install Certificate”.
Select the store location
Select “Current User” and continue with “Next”.
Choose the target store
Select “Place all certificates in the following store”, click “Browse” and select Trusted Root Certification Authorities.
Complete the import
Click “Next” and “Finish”, then confirm the Windows security warning with “Yes”.
Restart the browser
Close all Chrome or Edge windows and open the .local address again.
Under Audio Mode, select the source that matches your setup.
Demo
Quick function test
Transmits internal programme material or a 1 kHz test tone without an external audio source.
Analog
XLR/TRS mic/line
Uses the connected signals as 2 × mono, mono sum or 1 × stereo (L/R).
Network Dante
Audio network
Uses audio channels from an existing Dante network.
Configure Radio 1 first. Advanced parameters can be found later in the User Manual.
Select the format
Select the required channel count or Stream Configuration and the appropriate audio quality.
Name the stream
Under Channel Name, enter a short, clear name such as “Main Hall English”.
Set the language
Under Language, enter the ISO 639-3 code, for example deu or eng.
Assign the audio source
Under Input Device, select the required analogue or Dante input.
Identify assistive listening
Enable Assistive listening when the stream is used for hearing assistance. The setting is purely information for the receiver: it labels the stream there as assistive listening and changes neither the audio nor the transmission.
Set access
Leave Stream Password empty for a public stream or enter a password for protected access.
Check the stream, audio levels and reception immediately after starting.
Start transmission
Depending on the mode, select Start Demo or Start Auracast.
Check the status
Verify that the status indicator shows an active transmission with a blue indicator.
Check the audio level
Enable Audio level monitor and verify that a plausible audio signal is displayed.
Receive the stream
Find the assigned stream name on a compatible Auracast receiver and select it.
Carry out a listening test
Check intelligibility, channel assignment and the intended coverage area.
Check the basic connections and states first.
| Problem | Check first |
|---|---|
| Web interface cannot be reached | Check the network cable, that both devices are on the same network, and the device-specific .local address. |
| Stream is not visible | Check that transmission has started, the radio is enabled, and the stream name and transmit power are correct. |
| Stream has no audio | Check the audio mode, Input Device, source and Audio level monitor. |
| Audio is unstable | Check the distance, obstacles, QoS and transmit power. |
| Dante signal is missing | Check Dante routing, the selected input and network status. |
| Property | Value |
|---|---|
| Document version | 2026-07 |
| Last updated | 29 July 2026 |
| Data source | Technical specifications according to DS-TX-EN, Rev. A (2026-07) |