

Headphones
Direct output
The selected broadcast is sent through the 3.5 mm output to compatible headphones.
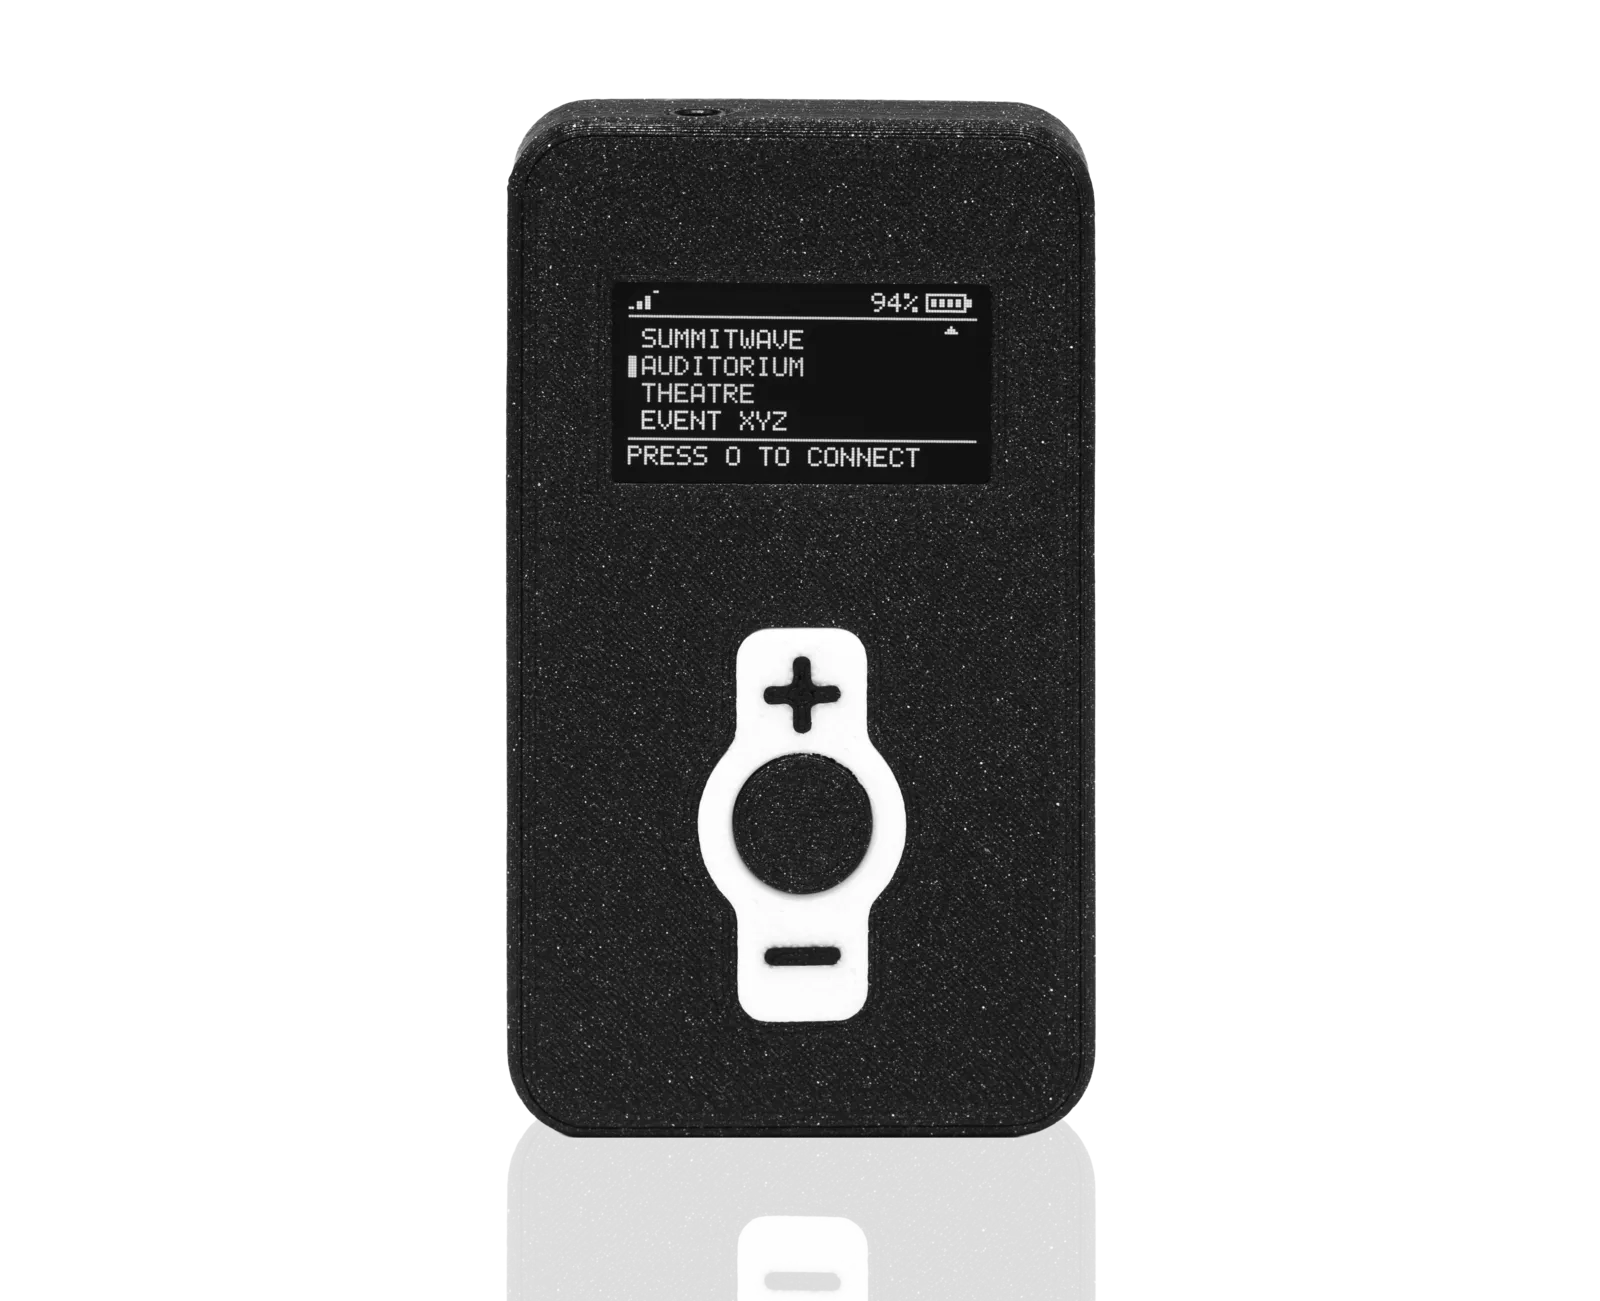
This manual covers charging and connection, broadcast selection, safe operation, return and care of the Summitwave RX.
The RX receives mono and stereo broadcasts over Bluetooth LE Audio and outputs them through headphones or compatible hearing loops.
Headphones
Direct output
The selected broadcast is sent through the 3.5 mm output to compatible headphones.
Inductive neck loop
Hearing assistance
A compatible neck loop can transfer the signal to a hearing system with its telecoil enabled.
Automatic roaming
Mobility
In a mesh setup with multiple Summitwave TX transmitters, the RX switches automatically between transmitters.
The following specifications are based on the Summitwave RX product datasheet DS-RX-DE, Rev. A (2026-07). Range, frequency response and system latency partly depend on the broadcast and transmitter used.
| RF / Auracast | Specification |
|---|---|
| Radio standard | Bluetooth LE Audio (Core 5.3) |
| Device mode | Auracast receiver (RX) |
| Supported broadcasts | Mono · Stereo |
| Frequency range | 2400–2483.5 MHz |
| Codec | LC3 |
| Typical system latency | 40 ms end-to-end · transmitter dependent |
| Typical range | up to 100 m · transmitter dependent |
| Channel control | selection using 2 buttons |
| Audio / operation | Specification |
|---|---|
| Audio output | 3.5 mm jack · TRS and TRRS with CTIA wiring |
| Use | common headphones and hearing loops |
| Frequency response | 10 Hz–22 kHz · broadcast and mode dependent |
| Sample rate / bit depth | 16 / 24 / 32 / 48 kHz · 16 bit |
| Output impedance | 16–32 Ω |
| Display | 1.2″ OLED |
| Controls | Power · channel selection · volume +/− |
| Accessibility | Haptic feedback · easy-to-read display · straightforward operation |
| Battery / mechanical | Specification |
|---|---|
| Battery | Li-Po · typ. 3.6 V · 2000 mAh |
| Runtime / charging time | 20 h / 4 h |
| Charging | Docking station |
| Dimensions | 90 × 60 × 20 mm (W × H × D) |
| Weight / colour | approx. 100 g · white or black |
| Operating temperature | −10 °C to +50 °C |
| Storage temperature | −40 °C to +60 °C |
| Ingress protection | IP44 |
| Compliance | CE (RED) · EN 62368-1 · RoHS · REACH · WEEE |
The RX uses a 1.2-inch OLED for channel, status and battery information, with controls for power, channel selection and volume.
| Parameter | Description |
|---|---|
| Power | Switches the RX on or off. Follow the information shown on the OLED display. |
| Channel selection | Moves through available broadcasts or saved favourite channels using two buttons. |
| Volume +/− | Adjusts the playback level. Always begin at a low setting. |
| Volume + and − together | Opens QC mode after about 6 seconds, showing packet losses and signal strength. The same combination leaves it again. |
| OLED display | The 1.2-inch display shows the channel, operating status and battery state. |
| 3.5 mm audio output | TRS and TRRS socket with CTIA wiring for compatible headphones and hearing loops. |
| Docking contacts | Charge the internal battery in the SW RX Charger 04. |
A clear preparation process prevents empty or incomplete loan devices from being issued.
Carry out a visual inspection
Check the enclosure, controls, audio connection, charging contacts and accessories for visible damage or contamination.
Place the RX in the docking station
Insert the RX fully into a charging slot. A complete charge takes 4 hours.
Check the state of charge
Check the battery indication on the OLED. A fully charged battery provides 20 hours of runtime according to the product datasheet.
Assign audio accessories
Prepare tested headphones or an inductive neck loop as required.
Perform a function test
Switch on the RX, select a test stream and verify audio output at low volume.
The RX receives an available broadcast. It does not require conventional one-to-one Bluetooth pairing with the transmitter.
Connect the audio output
Fully insert the intended headphones or compatible inductive neck loop into the audio output.
Reduce the volume
Set a low output level before putting on the headphones or switching the hearing system to the neck loop.
Switch on the RX
Switch on the device and wait until it is ready for use.
Open the broadcast channels
Display the available broadcasts or saved favourite channels and follow the information shown on the OLED.
Select the correct channel
Use the two channel buttons to choose the clearly named broadcast for the room, language or application.
Adjust the volume
Increase the volume slowly until playback is clear and comfortable.
In installations with multiple Summitwave TX transmitters, the RX can switch automatically between transmitters while continuing the selected content without another channel selection.
Select the channel once
Select the intended broadcast channel on the RX.
Walk through the venue
Move through all areas covered by the Summitwave TX installation.
Check the transitions
Confirm that content and volume remain consistent when the RX changes transmitters automatically.
Document edge areas
Record any locations with dropouts or unexpected channel changes for optimisation of the TX mesh.
A standard issue process makes operation simple for guests and traceable for staff.
| Phase | Task | Control point |
|---|---|---|
| Before opening | Charge the RX, assign accessories and listen to a test stream. | Device is complete, clean and functional. |
| Issue | Select suitable accessories and briefly explain stream selection. | Guest knows the volume controls, stream selection and return point. |
| During use | Keep a replacement device and contact person available. | A fault can be resolved without a long interruption. |
| Return | Check the device and accessories for completeness and damage. | Mark the issue as returned in the inventory system. |
| After use | Clean according to the hygiene procedure, function-test and recharge. | RX is ready for the next session. |
Careful handling improves availability and extends the useful life of the lending system.
| Parameter | Description |
|---|---|
| Cleaning | Switch off the RX and disconnect accessories and charging power. Clean it according to the approved hygiene instructions; do not immerse it in liquid. |
| Storage | Store the RX and accessories in a dry, protected location within the approved range of −40 °C to +60 °C. Do not place controls, plugs or charging contacts under load. |
| Transport | Use a suitable transport solution with separate compartments for receivers, headphones and neck loops. |
| Long-term storage | Check the battery state regularly and recharge the RX in the docking station when required. |
QC mode (quality control) shows packet losses and signal strength of the received broadcast in real time. It is intended for commissioning, sign-off of coverage areas and technical fault finding, not for guest operation.
Switch on the RX and select a channel
The values always refer to the broadcast currently being received. Without a selected channel there is nothing to measure.
Hold the volume buttons + and − together
Hold both buttons for about 6 seconds until the QC display appears on the OLED.
Read the values
Stay at the measuring point until the 10-second values have settled.
Leave QC mode
Hold the same button combination again until the RX returns to the normal display.
| Value | Meaning |
|---|---|
| Total packet losses | Total number of audio packets lost so far. If the figure stops rising at a fixed position, reception is stable there. |
| Packet losses, last 1 s | Packets lost during the last second. Responds immediately and reveals short disturbances while you change position, shading or transmit power. |
| Packet losses, last 10 s | Packets lost during the last 10 seconds. Smooths out single events and is the more meaningful value for assessing a location. |
| RSSI | Signal strength of the received broadcast in dBm. The value is negative; the closer to zero, the stronger the signal — −60 dBm is better than −85 dBm. |
| RSSI, 10 s average | Mean signal strength over the last 10 seconds. More reliable for assessing a location than the instantaneous value, because movement and shading make the RSSI fluctuate constantly. |
The two figures answer different questions: RSSI tells you how strongly the signal arrives at the RX. Packet losses tell you whether the audio data arrives complete. Only the combination gives the full picture.
Check the state of charge, audio accessories, stream availability and selection first.
| Problem | Check first | Next step |
|---|---|---|
| RX does not start | Check the battery state, correct position in the docking station and visible damage. | Charge the RX for up to 4 hours; remove it from service if it heats up or the battery is damaged. |
| No stream is visible | Is the TX active, is the RX in the intended coverage area, and has a scan been started? | Test with a second RX and check the stream name and transmit power at the TX. |
| Stream is selectable but there is no sound | Check that the headphones or neck loop are fully connected, and verify volume and stream selection. | Test the accessory on a second RX and check the stream at the TX. |
| Audio drops out | Check distance, obstacles, state of charge and local RF conditions. | Measure reception in QC mode: packet losses and RSSI show whether the signal is too weak or disturbed. |
| Controls do not respond | Check the device state and any lock indication. | Restart using the approved procedure or exchange the device. |
| Charging is not possible | Check the charging contacts, position in the docking station and its power supply. | Try another charging position; do not continue using damaged accessories. |
| Roaming is interrupted | Check the coverage area, active TX transmitters and consistent channel provisioning. | Measure the transition area in QC mode and check the TX mesh configuration. |
| Property | Value |
|---|---|
| Document version | 2026-07 |
| Last updated | 29 July 2026 |
| Data source | Technical product data according to DS-RX-DE, Rev. A (2026-07) |